overflow:scroll; 이라는 스타일을 지정해 주면, div 내용이 넘치든 아니든, 항상 스크롤바가 붙습니다. 이것이 가장 많이 쓰이고 가장 무난하더군요.
overflow:auto; 라는 스타일을 지정해 주면, 내용이 div 박스 밖으로 넘칠 때에만 스크롤바가 붙습니다. 이것도 많이 쓰이는 편이지만, 내용물의 양에 따라서, 스크롤바가 붙었다 안 붙었다 하기에 디자인에 좀 어려움이 있습니다.
overflow:hidden; 으로 하면, div 박스 밖으로 넘치는 것은 보여주지 않고 그냥 숨겨 버립니다. 스크롤바도 붙지 않습니다. 특별한 목적이 있을 때에만 쓰입니다.
white-space:nowrap; 문자열이 길면 다음줄로 자동으로 행갈이가 되는데, nowrap 은 행갈이를 하지 말고 한 줄로 길게 이어서 쓰라는 의미입니다. 프로그래밍 소스 코드 등을 표현할 때에는 행갈이를 하지 않는 것이 자연스럽습니다.
width:300px; height:150px; div 박스의 가로 세로 크기를 지정하는 것인데, 퍼센트(%)로 지정해도 좋습니다. height 속성을 생략하면 문장의 분량에 맞게 div 박스의 세로 길이가 자동으로 정해집니다. 둘 다 생략하면 스크롤바가 만들어지지 않을 수도 있습니다.
padding:10px; div 박스 안으로 약간의 여백을 주어 보기 좋게 하는 것입니다. 필수적인 것은 아닙니다.
background-color:gold; div 박스의 바탕색을 지정하는 것입니다. 필수적인 것은 아닙니다.
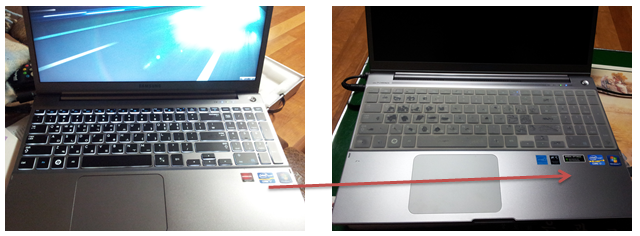
나의 5번쨰 노트북은 크로노스 입니다. 그런데.. 크로노스만 5대째라는 불쌍한 현실이랍니다. 그래서 다시 한번 정리를 해봅니다.
LG노트북을 쓰다가 블루투스 문제로 인하여 바이바이 하고.. 노트북을 찾아보던중 삼성에서 크로노스 노트북이라는 신제품이 나온다는 소식을 접했습니다. 작년말부터 기다리다가 올해 1월 13일 디지털플라자 봉천점에서 드디어 구매를 했습니다.
그런데 구정이 되기 전에 한가지 문제가 발생했습니다. 키보드 들림현상이라는 것인데.. 특히 스페이스바에서 더욱 심한 증상입니다. 바로 동영상을 찍어서 유투브에 올렸고 AS센터에 애기를 했더니..
대부분의 기사들이 그 노트북의 특성이라고 했습니다. 그런데.. 불편하니까.. 바꿔준다고 선심을 쓰듯 교체를 해줍니다. 그래서 2번쨰 노트북을 받았고 기존에 사용하고 있던 SSD를 새로운 노트북에 옮겨주었는데.. 바로 키고서.. 테스트를 해보는데..
동일증상입니다. 결국 2번째 크로노스는 환불처리가 되었습니다. 2월경에 키보드 문제가 해결된 제품이 나오고 그 이전 제품들은 모두 수거되었다는 소식이 들립니다. 그런데.. 공식리콜은 아니더군요.
그래서 알아보던중에 디플보다는 가격이 싼 인터넷에서 구매를 했습니다. 그런데.. 동일한 1월제품을 주더군요. 2월제품을 달라고 했건만.. 택배로 온 제품은 1월 생산품이었고 키보드 관련 문제는 동일하게 있는 제품을 받았네요. 바로 AS센터에 가서.. 2월제품으로 교환했습니다.
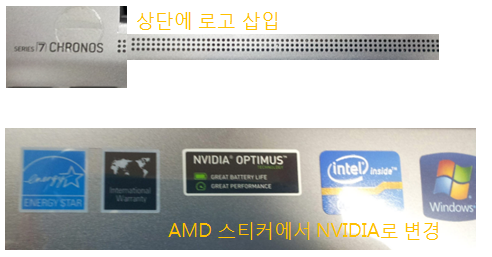
그래서 3번쨰를 거쳐서 4번쨰 크로노스 노트북이 제손에 들어왔습니다. 그래서 한번 봤었던 SSD교체작업을 직접 진행하고 OS를 다시 깔았는데.. 크로노스의 특장점인 Express Cache가 활성화되지 않습니다.
하드를 사용하던지 SSD를 사용하던지 간에.. 내부 보드에 존재하는
Express Cache 가 활성화되지 않아 온라인 신청을 통해 프로그램을 설치해 보라고 하더군요. 그래서 깔아봤는데 안됩니다. 결국 AS기사를 출장으로 불렀습니다.
기존에 환불과 교환을 했었던 신림쪽 센터가 아닌 금천에서 오더군요. 그런데.. 오셔서 몇번 해보더니.. 안된답니다. 그래서 들어가서 확인해보고 연락을 준답니다. 그러라고 했습니다. 하지만 몇일뒤에 내부에 하드가 아닌 SSD를 교체해서 활성화가 안된답니다. 이해되지 않는 부분인데.. 하드던지 SSD던지 뭘 쓰던지 간에 보드에 있는 Express Cache가 활성화되지 않는것은 아무래도 제품의 문제가 있는거 아니냐고 했더니.. 엔지니어가 연락한답니다.
담당엔지니어는.. 연락을 해서.. 하는말이 내부에 하드대신 SSD가 들어있어서.. 활성화가 안되는것이 맞답니다. 내부에 빠른 SSD가 있는데 16기가의 Express Cache 쯤은 없어도 별 문제가 안될것 같다는..
하지만 저는 16기가를 템프 폴더로 운영될 것이라고 믿는 사람이었는데.. 안된다니.. 이해되지 않습니다. 결국 AS센터에서 환불을 권유합니다. 이번에는 보유중이던 삼성SSD까지 같이 반납합니다.
그리고 다시 디지털프라라자 봉천점에 가서 담당자한테.. 하소연하면서 제대로 된 제품을 보내달라고 하면서 재구매를 합니다. 드디어 5번쨰 크로노스가 제손에 들어오지만.. 몇일이 지나서.. 소음문제가 부각되네요. 지금까지 4대를 썻지만 이런 소음은 처음입니다.
펜돌아 가는 소리 같은데.. 저음모드이던.. 정상이던.. 동일한 소리가 납니다. 녹음은 했는데.. 하직 핸드폰에 있어서.. 소리는 윙~~~ 윙~~~ 하면서 커졌다가 작아졌다가 하면서 반복됩니다. 소음이 없는 도서실 같은 곳에서는 도저히 사용할 수 없는.. 그런 소음이 없어지지 않으니..
또 다시 AS센터에 갑니다. 미리 토요일 9시 10분에 예약을 하고.. 10시부터 학원수업이 있어서 주말이지만 아침일찍 나갑니다. 담당엔지니어와 만남을 가지고 들은말은 보드와 일체형이라 보드를 갈아야 한다고 합니다. 그런데.. 부품이 없답니다. 그리고 하드를 계속 읽는것을 봐서는 하드 문제일수 있다고.. 하드에서 열이 나니까.. 펜이 계속 도는 것이라고..
그래서 저는 펜이 돌아도
윙~~~ 윙~~~ 과 같이 소리가 커졌다가 작아졌다 하면서 도냐고 물었지만 그럴지도 모른다고.. 그래서 하드는 교체할 수 있냐 물었지만 1테라짜리 하드가 없다고 하네요
삼성 AS 센터가 맞는지 의심스러운 부분입니다. 보드도 없고 하드도 없고.. 하드는 원래 초기 상태로만 만들어 준다고.. 그럼 백업하고 다시 필요한 프로그램들 다 까는데 하루가 걸리는데
제품의 문제떄문에 내시간을 하루 소비해야 하냐고 ? 그제서야.. 복구프로그램을 사용해서 백업했다가 복구해 주겠다고. 그런데 2~3시간 걸린다고.. 그리고 하드가 없다고..
무조건 맡기고 가라는 식의 애기인데.. 난 회사에서도 노트북만 쓰는데.. 맡기면 난 출근해도 컴퓨터 없어 일을 못한다고.. 했더니.. 가산으로 와서 해주겠다고.. 하는데.. 시간은 동일하게 2~3시간.. 그럼 회사에서 2~3시간을 놀라는 애긴데..
마지막으로 HDMI로 모니터를 연결해서 쓰는데.. 프로그램 윈도우를 다른 모니터쪽으로 옮길떄 버벅거리는 증상이 있으니.. 그건 왜 그러냐고 했더니.. 처음 듣는다는 말만.. 그런 증상은 없었다고.. 그런데.. 난 4대 모두 그랬는데.. ??
결국 집도 아니고 회사에서 그럴수도 없고... 정말 미치겟더군요. 그래서 일단 나왔습니다. 그리고 디플 담당자에게 전화를 했는데..
자기가 삼성담당자에게 메일을 보내서 다음에 받는 제품은 제대로 된 제품을 받게 해주겠다고 해서... 메일 보내는걸 정리해 주고 왔습니다. 그 메일은 월요일에 삼성쪽 담당자에게 발송된것 같더군요.
그리고 AS담당자에게 연락했더니.. 사업부에서 AS센터로 연락와서 문제가 뭐였냐고 물어봤답니다. 저한테도 물류센터라고 하면서 바로 연락이 직접 왔구요. 정말 복잡합니다.
오늘 들은 애기는 AS쪽에서는 내 제품을 수거해서.. 문제를 분석하고 동일 문제가 없는 제품을 보내주겠다고 했다던데.. 난 반납하면 쓸 컴퓨터가 없으니.. 못주겠다고 우기고 있구..
내가 삼성의 품질테스트 직원도 아니고.. 베타테스터도 아닌데.. 왜 내 노트북을 달라고만 하는지.. 그럼 줄테니까.. 대체품을 보내주던지.. 그것도 아니고 아직 내소유인 제품을 달라고만 하는걸까요 ?
전에 LG에서는 블루투스 문제로 공장에서 분석한다고 했을떄 대체품 달라고 했더니.. 바로 갖다주던데.. 블루투스 마우스까지 같이 가져가서 1주일동안 유선마우스 쓰긴 했지만..